In addition, he replaced his account profile picture with a black picture. Since he posted that tweet (say he will delete his Twitter account), he hasn’t updated anything, including replying to messages.
Maybe it’s true, maybe it’s just a joke. Who knows?
a=2
with open(('1.md'), 'r',encoding='UTF-8') as f:
    for line in f:
        for ch in line:
            if ch=='$':
                if a % 2 == 0:
                    ch='【latex】'
                    a = a + 1
                elif a % 2 != 0:
                    ch = '【/latex】'
                    a = a + 1
            print (ch,end='')
有注释版代码:
a=2
with open(('1.md'), 'r',encoding='UTF-8') as f:
# 读取 1.md 文件中的内容,可以读取中文。
    for line in f:
    # 遍历一行
        for ch in line:
        # 遍历一行中的每一个字符
            if ch=='$':
                if a % 2 == 0:
                # 如果 a 为偶数,把 $ 换成 【latex】
                    ch='【latex】'
                    a = a + 1
                    # 操作完成,改变 a 的值
                elif a % 2 != 0:
                # 如果 a 为奇数,把 $ 换成 【/latex】
                    ch = '【/latex】'
                    a = a + 1
                    # 操作完成,改变 a 的值
            print (ch,end='')
            # 输出本行的操作结果(end='' 保证了输出完一整行后再换行)
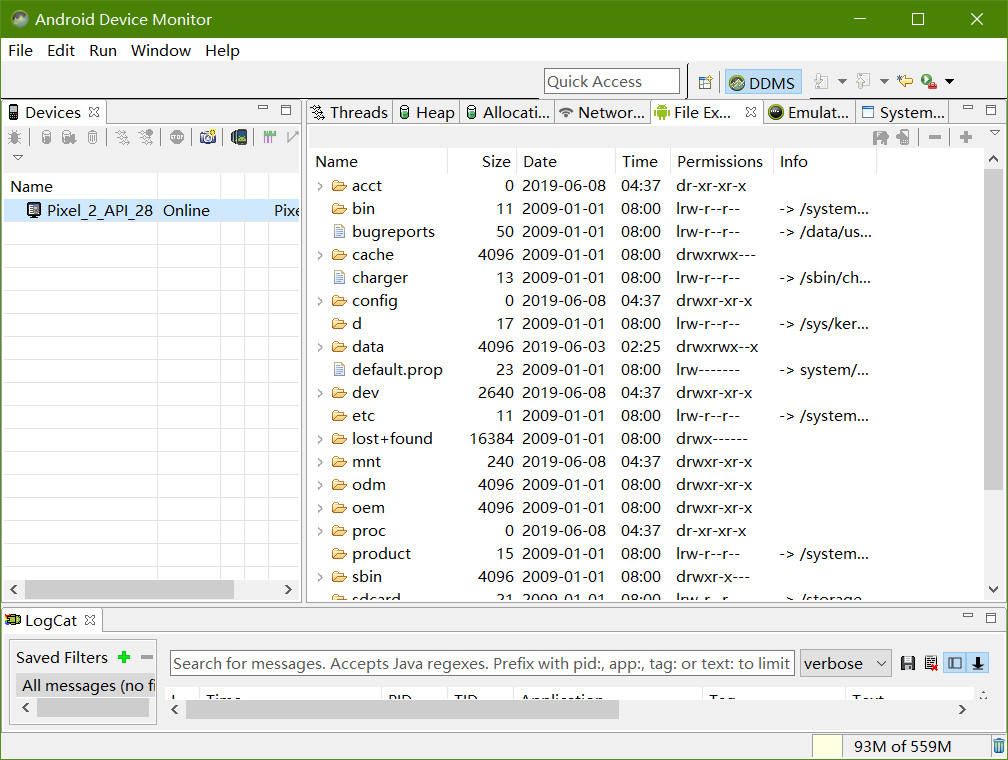
Android Studio 的版本经历了几次更新,导致 ADM (Android Device Monitor) 的打开方式也发生了几次变化,因此,在网络上找怎么打开 ADM 的话可能会发现没法在自己的 Android Studio 上重现他们的方法,这主要是 Android Studio 的版本不同导致的,建议大家在参考本文的时候也查看一下自己的 Android Studio 的版本(我的文章基本都会注明“操作环境”). 但是,版本不同不表示操作方法一定不同,具体还需要根据实际情况确定。
Google 从 Android Studio 3.2 开始就完全弃用了 Android Device Monitor, 相关解释的原文地址如下:
Android Device Monitor was deprecated in Android Studio 3.1 and removed from Android Studio 3.2. The features that you could use through the Android Device Monitor have been replaced by new features. The table below helps you decide which features you should use instead of these deprecated and removed features.
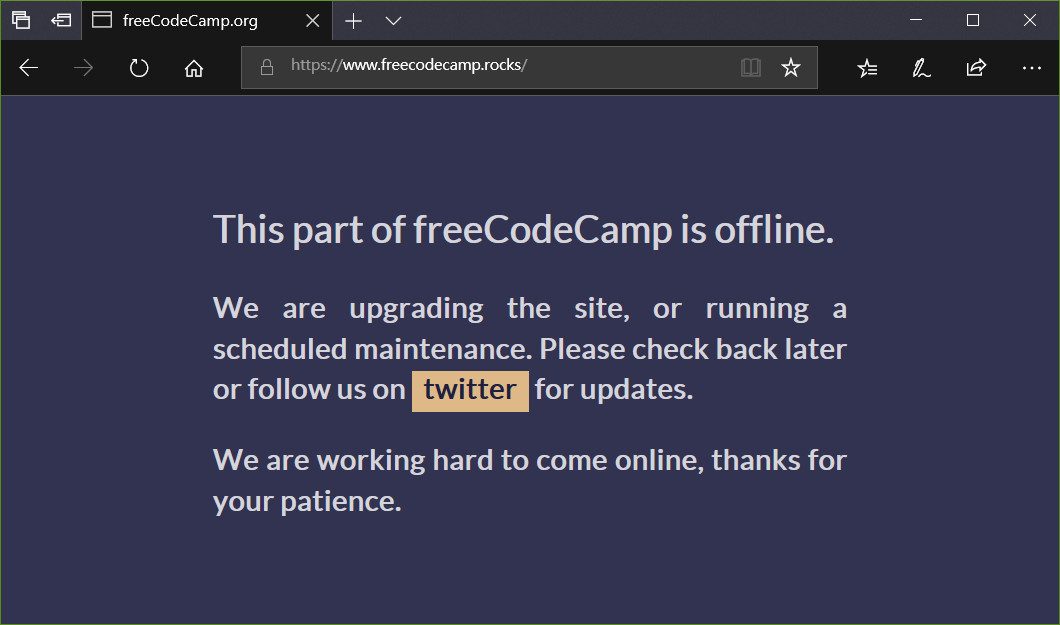
freeCodeCamp 从 2015 年开始在 Medium 上面发布文章,并且至今已累计发布约 5000 篇文章。但是随着 Medium 转移到付费模式并且开始重点推荐付费文章,这使得 freeCodeCamp 在 Medium 上的免费文章的流量来源不再主要是 Medium 自身,而是 Google 和社交媒体。
首先进行第 1 次遍历,选取整个队列 (队列长度为 N) 的第 1 个数字 (记为 a),和紧邻 a 后的数字 (记为 b) 比较大小,如果 a 大于 b, 则交换 a 与 b 的位置,此后,a 继续和紧邻 a 后的数字 c 比较;如果 a 小于 b, 则丢下 a, 拿起 b, 并和紧邻 b 后的后的数字比较大小。经过这一轮比较,当比较到整个队列结束时,一共进行了 N-1 次比较,此时,整个队列中最大的数字排在了整个队列的最后;
C++ 中的变量,大致可以分为(该分类不严格,仅供参考)“全局变量”、“局部变量”、“静态变量”、“全局静态变量(或称“静态全局变量”)”、“局部静态变量(或称“静态局部变量”)”和指针变量等。局部变量是存放在内存的堆区的,一旦一个函数执行完毕,则编译器就会自动释放这部分内存,该局部变量也随之消失。全局变量和静态变量都是存放在数据区(也称“全局区”或者“静态区”)的,该区域的内容可以被全局共享,在整个程序结束时,由系统自动释放。
C++ 中不允许把一个数组或者多个数值作为一个整体返回,也就是说,对于 C++ 中的任何一个函数, 其返回值只能是 0 个或者 1 个单独的数字,不能是一个数组或者多个数字。不过,我们可以结合使用指针和数组(由于数组在内存中是使用一块连续的区域存储的,因此,只要知道了一个数组中第一个元素的地址并且知道了这个数组的长度,那么就可以找到和处理整个数组)来达到返回多个数值的目的。
#include <iostream>
using namespace std;

int * ReturnMyArr(int a[], int b[]){
    for(int i=0; i <= 2; i++){
        b[i] = a[i];
    }
    return b;
}

int main(){
    int a[3] = {1,2,3};
    int b[3];
    int *p;
    p = ReturnMyArr(a,b);

    for(int i = 0; i <= 2; i++){
        cout << *(p+i) << " ";
    }
    return 0;
}
运行结果如下:
1 2 3
Process returned 0 (0x0)   execution time : 0.194 s
Press any key to continue.
操作系统:Windows 10 64 位 中文家庭版 CPU 集成显卡型号:Intel(R) UHD Graphics 620 独立显卡型号:NVIDIA GeForce MX150 OBS Studio 版本:23.1.0 (64 bit)
问题描述
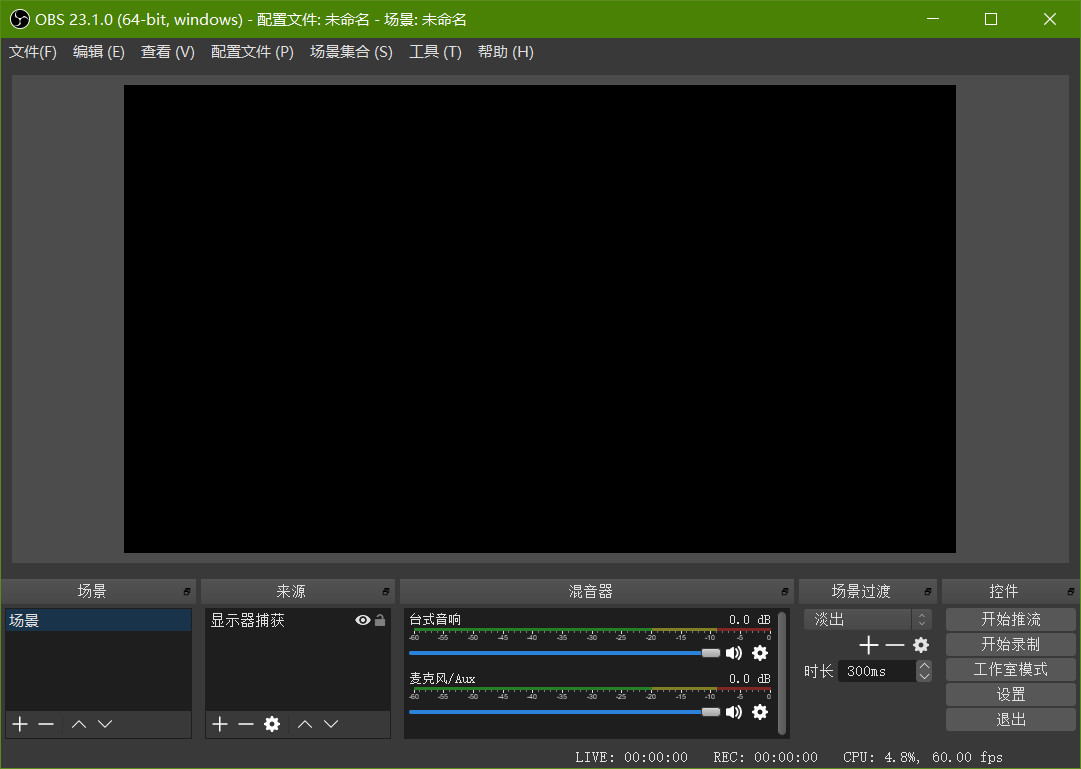
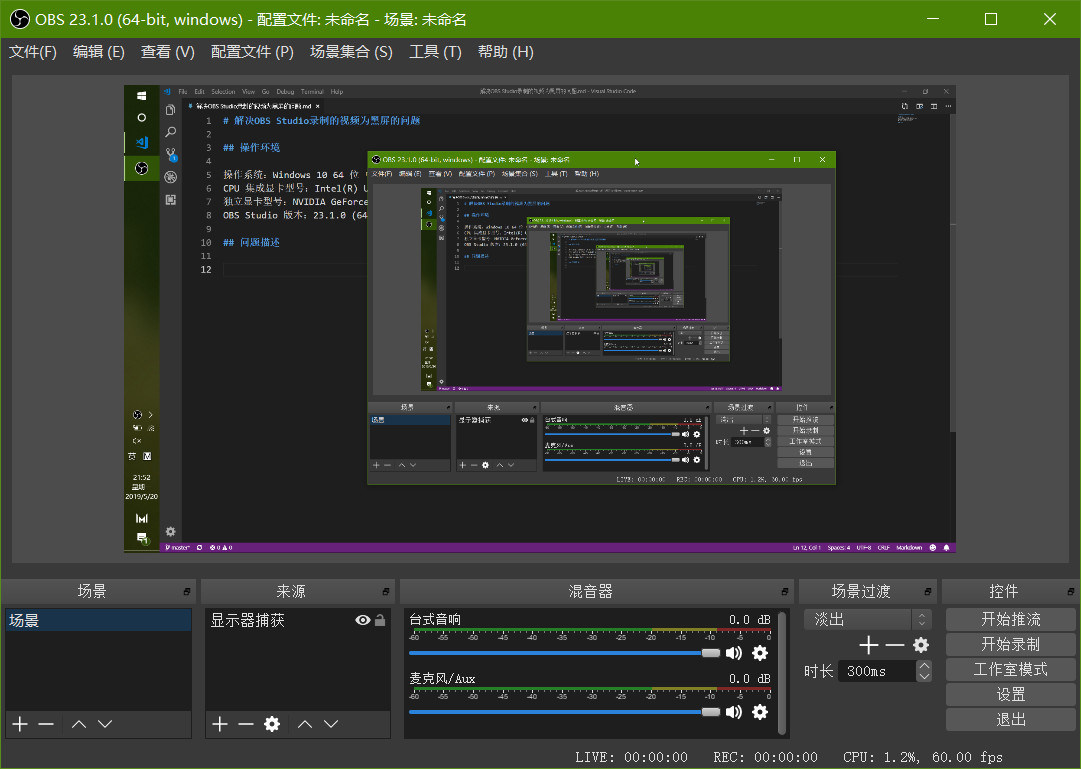
我在 OBS Studio 的官网上下载安装了 OBS Studio, 但是,安装完成之后,在“来源”中添加“显示器捕获”之后预览框和录制得到的视频都是黑屏,如图 1:
图 1
解决过程
安装包是从官网下载的,安装过程没有报错,启动过程也没有报错,但是却捕捉不到显示器中的图像。首先考虑的是软件兼容性的问题,但是在我将兼容性设置成 “Windows 7″并且赋予 OBS Studio 管理员权限之后,录制得到的图像仍然是黑屏。这说明该问题的产生不是由于兼容性或者权限问题导致的,因此,随后我又将兼容性和权限恢复到了默认的状态。另一个需要考虑的问题就是显卡了。我的这台电脑有两个显卡,一个是英特尔 CPU 上的集成显卡,另一个是英伟达的独立显卡。根据我查找到的数据,OBS Studio 只能捕捉到和自己使用相同显卡的窗口或者程序。由于我是想要录制桌面的视频,因此,我在 Windows 10 的“任务管理器”中查看了“桌面窗口管理器(dwm.exe)”所使用的显卡是哪一个,结果发现,桌面窗口管理器使用的集成显卡,如图 2:
图 2
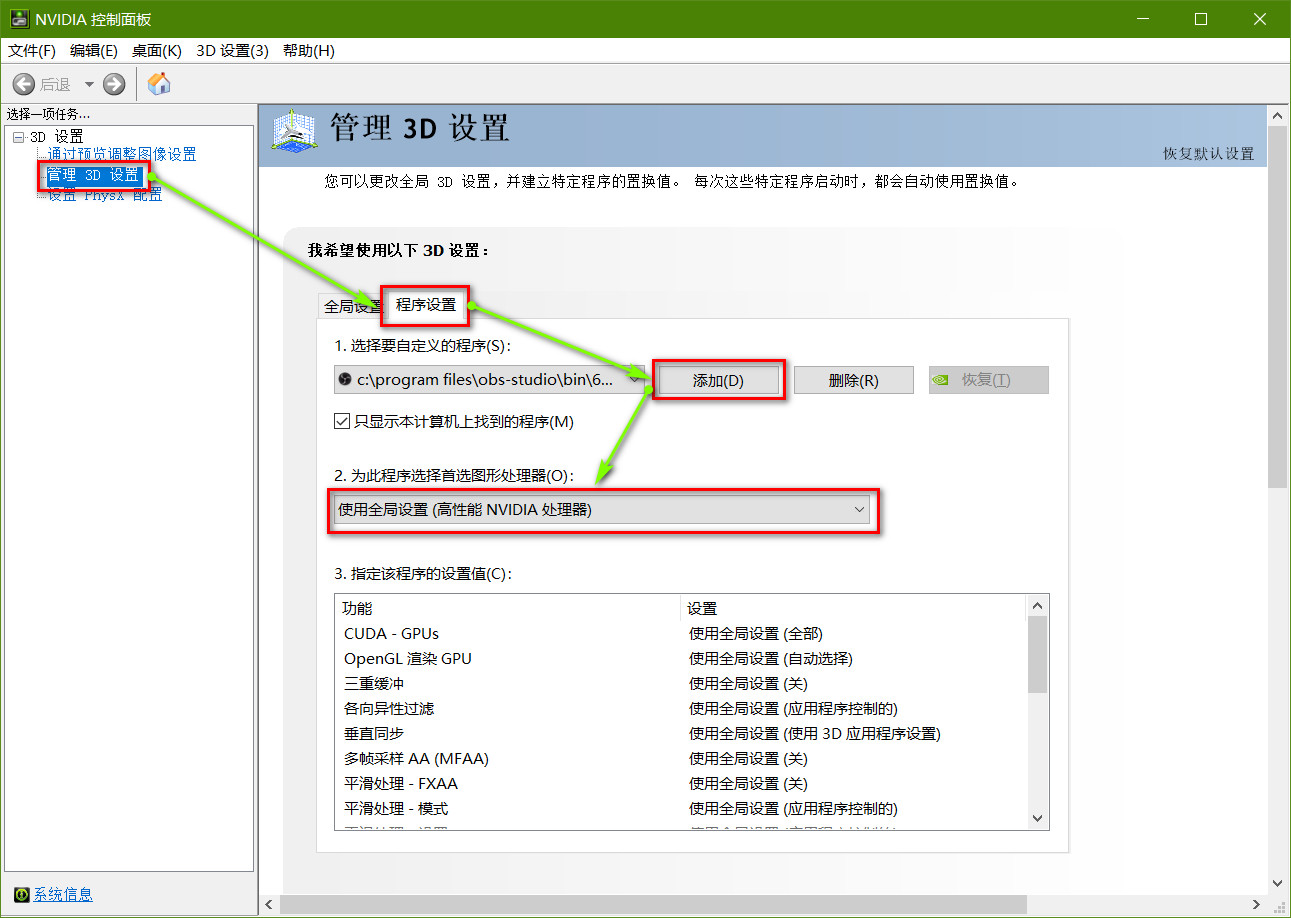
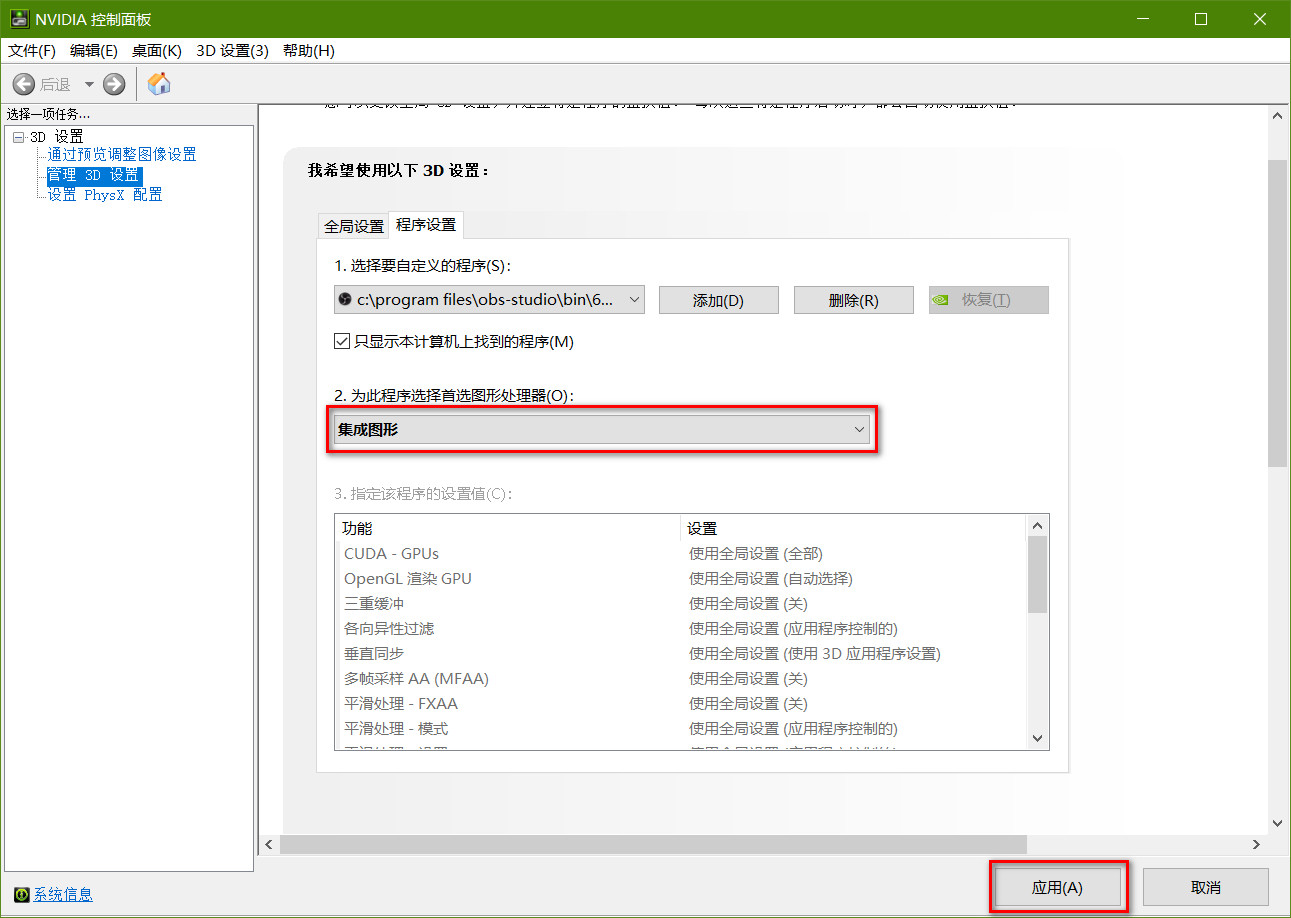
根据上面的分析可以知道,只需要把 OBS Studio 使用的显卡设置成集成显卡应该就可以完成对屏幕的录制。首先打开“NVIDIA 设置”,依次打开“管理 3D 设置 / 程序设置”,之后使用“添加”按钮找到 OBS Studio 并添加,这时我发现,我这台电脑上的 OBS Studio 此时使用的是“高性能 NVIDIA 处理器”,如图 3:
Media Statement Regarding the U.S. Department of Commerce Announces the Addition of Huawei to the Entity List
Huawei is against the decision made by the Bureau of Industry and Security (BIS) of the US Department of Commerce.
This decision is in no one’s interest. It will do significant economic harm to the American companies with which Huawei does business, affect tens of thousands of American jobs, and disrupt the current collaboration and mutual trust that exist on the global supply chain.
Huawei will seek remedies immediately and find a resolution to this matter. We will also proactively endeavor to mitigate the impacts of this incident.